The kids and DJ all enjoyed one of the cupcakes I made yesterday for dessert last night and then I shipped all the remaining cupcakes off to work with DJ this morning. I can't have yummy cupcakes overflowing in my kitchen or my diet will go out the window. Besides, I plan to make lots and lots of recipes until I find just the right one, so out with the old and in with the new today!
Next up, White Cupcakes from Amber's Delectable Delights. Again, this recipe called for only 12 cupcakes and again, there was just too much batter for only 12 cups. But I am staying true to these recipes the first go around, so I filled them up to the top. They rose quite a bit and have that muffin top I don't like. I only baked them for 16.5 minutes instead of 20. I also used clear vanilla extract so that they would be true white. Unfortunately, they still have a yellow tint to them. I had to use salted butter since I had no unsalted butter on hand, but I ommitted the 1/4 tsp salt. These cupcakes turned out too dry. They were not overcooked so I know it wasn't that. And there just wasn't enough flavor to tempt me to make them again.
For the frosting, this time I tried Brown Eyed Baker's Vanilla Buttercream Frosting. I followed it exactly as the recipe perscribed with the exception of using salted butter instead of unsalted. I didn't have any unsalted on hand. The frosting is very creamy and smooth. It is pretty sweet though. And definitely soft. I put it in the fridge for about 30 minutes and when I took it out to pipe with I had to wait about 5 minutes for it to warm up before I could work it through the tip. But once I did, the frosting held up beautifully. It pipes well, is pretty sweet and would be fine left out of the refrigerator. It's in the running.
Friday, April 29, 2011

Thursday, April 28, 2011
Vanilla Cupcakes - Brown Eyed Baker
First UP, Vanilla Cupcakes from Brown Eyed Baker. The only reason this one was first was because I had all the ingredients on hand for it and didn't have to go to the store to start my quest.
Her recipe said to only fill 12 cupcakes with the batter. I followed it as outlined and once the cupcakes were done baking they were a little too big and had a small "muffin top" rim from being overly full. Perhaps my cupcake pan is slightly smaller than hers. Next time I would make it into 14 cupcakes.
The flavor and texture of the cupcakes were good. I baked them for 19 minutes and I still think they were overdone. Next time I'd only go with 18 minutes. I think this affected the moisture of the cupcake, causing them to be a tad bit dry. I also used reduced fat sour cream, which may affect the taste a little. I think these are worth a second go, using full fat sour cream and spreading into 14 cups and reducing the baking time to 17-18 minutes. Good potential!
I decided to pair these with Brown Eyed Baker's Cream Cheese Frosting as well. For the frosting, I had to add an extra cup of powdered sugar to get it to a consistancy that wasn't so soft. Before adding the extra cup of sugar it was almost "melty" it was so soft. I need the frosting that I choose to have enough stiffness to it to pipe and stay put. The flavor was very yummy, as a cream cheese frosting should be, but I don't think this will be the frosting recipe I use.
Her recipe said to only fill 12 cupcakes with the batter. I followed it as outlined and once the cupcakes were done baking they were a little too big and had a small "muffin top" rim from being overly full. Perhaps my cupcake pan is slightly smaller than hers. Next time I would make it into 14 cupcakes.
The flavor and texture of the cupcakes were good. I baked them for 19 minutes and I still think they were overdone. Next time I'd only go with 18 minutes. I think this affected the moisture of the cupcake, causing them to be a tad bit dry. I also used reduced fat sour cream, which may affect the taste a little. I think these are worth a second go, using full fat sour cream and spreading into 14 cups and reducing the baking time to 17-18 minutes. Good potential!
I decided to pair these with Brown Eyed Baker's Cream Cheese Frosting as well. For the frosting, I had to add an extra cup of powdered sugar to get it to a consistancy that wasn't so soft. Before adding the extra cup of sugar it was almost "melty" it was so soft. I need the frosting that I choose to have enough stiffness to it to pipe and stay put. The flavor was very yummy, as a cream cheese frosting should be, but I don't think this will be the frosting recipe I use.
Cupcake Hunt
I'm going to be making cupcakes for my sister and her friends combined birthday party. I am on the hunt to find the best vanilla cupcake, with the best vanilla or cream cheese frosting. I will also be working on some fondant monogrammed toppers and some extra fancy little accessories. Is it possible for a cupcake to have accessories?
So that I remember which recipes I've tried and which ones I liked, I will be posting my reviews and info about each. Let the cupcake hunt begin!
So that I remember which recipes I've tried and which ones I liked, I will be posting my reviews and info about each. Let the cupcake hunt begin!
Monday, August 9, 2010
Knit Pants For My Boy
I have been busy making A LOT of knit pants, skirts and shorts. Ethan has three new pairs of knit shorts for PJ's, Addison has several skirts that I'll post about later and Austin has a new pair of knit pants. He doesn't really need them, but the fabric was so cute that I just had to do it. I think I could even get away with him wearing them to church, if I put a nice button up shirt with them.


Monday, July 26, 2010
Black Forrest Cake
I made this Black Forrest Cake from Brown Eyed Baker for my husbands birthday. It was DIVINE! Really, the cake was so moist and chocolaty and the cherries were soft and sweet and the whipped topping was light and not overly sweet. We devoured it at his camping/cook out party.
I changed up the middle cherry layer just a bit. Everything else I did exactly as her recipe called for.
Cherry Layer:
2 cups of fresh or frozen pitted cherries
1/4 cup of water
3/4 cup of sugar
2 TBS of cornstarch
1 tsp of vanilla
Put the cherries into a medium sauce pan and heat on medium until the cherries are warm and juices are released. Add the water, sugar, and cornstarch to the cherries. Stir and cook until bubbly and the sauce has thickened. Remove from heat and stir in the vanilla. Let the cherry and sauce cool completely. Add the cherries and as much sauce as you prefer to the middle layer of the Black Forrest Cake. The sauce makes the cake all that more moist. Reserve 12 of the cherries for the top of the cake.


I changed up the middle cherry layer just a bit. Everything else I did exactly as her recipe called for.
Cherry Layer:
2 cups of fresh or frozen pitted cherries
1/4 cup of water
3/4 cup of sugar
2 TBS of cornstarch
1 tsp of vanilla
Put the cherries into a medium sauce pan and heat on medium until the cherries are warm and juices are released. Add the water, sugar, and cornstarch to the cherries. Stir and cook until bubbly and the sauce has thickened. Remove from heat and stir in the vanilla. Let the cherry and sauce cool completely. Add the cherries and as much sauce as you prefer to the middle layer of the Black Forrest Cake. The sauce makes the cake all that more moist. Reserve 12 of the cherries for the top of the cake.


Friday, July 23, 2010
Raspberry Crisp Bars
My husband really went overboard on buying fresh fruit this past week, so that's why I've had so many fruity recipes lately. The raspberry flat he bought was great, but they were so ripe that they started to get mushy too quickly. Wasting raspberries was out of the question, so it was time to find another way to use them up. This recipe from Allrecipes.com did the trick. Again, I made a few alterations and I loved the results. Next time I make it, I may get a little crazy and try to make it with Coconut Oil instead of butter. I don't know how that would affect it, but I think it's worth a try to make it more healthy.
Raspberry Crisp Bars
Raspberry Crisp Bars
1 cup white sugar 1 teaspoon baking powder 3 cups white whole wheat flour 1 cup room temp butter 1 egg 1 pinch salt 1 pinch ground cinnamon 4 cups raspberries (or any kind of fresh berry) 1/2-3/4 cup white sugar 3 teaspoons cornstarch |
Directions:
| 1. | Preheat oven to 375 degrees F (190 degrees C). Grease one 13x9 inch pan. |
| 2. | Combine 1 cup of the sugar, the flour, baking powder, salt, ground cinnamon, butter, and egg. I use my hands to break up the butter and work it until it's a crumbly dough. Pat half of the dough into the prepared pan. |
| 3. | Combine the remaining 1/2 to 3/4 cup sugar (this varies based on the sweetness of the fruit you are using), the cornstarch and berries. Place mixture over dough in pan. Crumble the remaining dough over the tops of the berries. |
| 4. | Bake at 375 degrees F (190 degrees C) for 45 minutes or until the top is slightly brown. |
Thursday, July 22, 2010
Blueberry Peach Coffee Cake (or Muffins)
Staying true to what I talked about doing in my last post, here is another recipe that I made today. We had some blueberries and nectarines that were getting a bit too ripe and I didn't want them to go to waste. So I got the base of this recipe from Allrecipes.com, but altered it quite a bit and it turned out fantastic. I love using the whole wheat flour in my baking and having things still turn out tasting delicious.
Blueberry Peach Coffee Cake (or Muffins)
Blueberry Peach Coffee Cake (or Muffins)
3 cups white whole wheat flour 3/4 cup white sugar 1/2 cup brown sugar 1 tablespoon baking powder 1 pinch salt 1 tsp ground cinnamon 1/2 tsp ground nutmeg 3 eggs 1 cup milk 1 tsp vanilla 1/2 cup melted butter 1 1/2 cups blueberries 1 1/2 cups peeled and diced fresh peaches or nectarines Topping:
|
Directions:
| 1. | Preheat the oven to 400 degrees F (200 degrees C). Grease 13x9 pan or muffin tins, or line with paper liners. |
| 2. | In a large bowl, stir together the flour, white sugar, brown sugar, baking powder, cinnamon, nutmeg and salt. In a separate bowl, mix together the eggs, milk and 1/2 cup of melted butter and vanilla until well blended. Pour the wet ingredients into the dry, and mix until just blended. Fold in the blueberries and peaches. Fill pan or muffin cups with batter. |
| 3. | For the 13x9 pan, back for 30-35 minutes or until a toothpick comes out clean. For the muffins, bake for 18 to 20 minutes. After pulling them out of the oven, spread the 2 TBS of butter on top, the butter will melt as you spread it around. Then sprinkle with the 2 tsp of sugar. Cool in the pan over a wire rack. |
Monday, July 19, 2010
Yummy Banana Bread Recipe
I made this banana bread today from Our Best Bites. It's a Coconut Banana Bread with Lime Glaze. I modified the recipe and made a couple mistakes along the way, but it stilled turned out amazing. That's the sign of a recipe with good bones. If you mess it up and it still turns out delicious, then it's a winner in my book. For my own sanity, I'm writing down my modifications so that I remember what to do next time. I basically just made it a bit more healthy by using whole wheat flour and substituting coconut oil for butter.
Posting it on my blog also helps me keep track of which recipes I've tried from which blogs. I really need to do this with everything I make so that I can keep my own personal "best of" and "don't make this again" lists. :)
Coconut Banana Bread with Lime Glaze
adapted by To Craft or To Cook, which was adapted by Our Best Bites from Cooking Light
2 C white whole wheat flour
3/4 tsp baking soda
1/2 tsp salt
1 C sugar
1/4 C coconut oil, room temp
2 large eggs
1 1/2 C mashed ripe bananas (about 4 large bananas)
1/4 C sour cream or plain yogurt
3 Tbs apple juice or milk*
1 tsp vanilla extract
1/2 C coconut
Topping: 2 Tbs additional coconut
Glaze: 1/2 C powdered sugar whisked with 1 1/2 Tbs fresh lime juice
*as in: don't go buy apple juice just for this recipe. If you don't already have some, just use milk!
Preheat oven to 350 degrees.
Whisk flour, baking soda, and salt together and set aside.
In a large mixing bowl, beat oil and sugar until blended. Add eggs and beat to combine. Add banana, sour cream or yogurt, apple juice (or milk), and vanilla. Beat until blended.
Add flour mixture and beat at a low speed until just combined. Stir in 1/2 C coconut.
Pour batter into a 9x5" loaf pan that has been sprayed with non-stick spray. Sprinkle additional 2 Tbs coconut on top.
Bake in the oven for about 1 hour or until a knife or skewer inserted in center comes out clean. Note: Check bread after about 40 minutes. If the top has browned and the coconut pieces are looking toasty, cover top of bread lightly with a piece of foil. Continue baking until done.
When done, remove pan from oven. Let cool on a cooling rack for about 10 minutes and then carefully remove from pan. Whisk powdered sugar and lime juice together for the glaze and then drizzle over top. Cool for another 15 minutes before slicing.
Posting it on my blog also helps me keep track of which recipes I've tried from which blogs. I really need to do this with everything I make so that I can keep my own personal "best of" and "don't make this again" lists. :)
Coconut Banana Bread with Lime Glaze
adapted by To Craft or To Cook, which was adapted by Our Best Bites from Cooking Light
2 C white whole wheat flour
3/4 tsp baking soda
1/2 tsp salt
1 C sugar
1/4 C coconut oil, room temp
2 large eggs
1 1/2 C mashed ripe bananas (about 4 large bananas)
1/4 C sour cream or plain yogurt
3 Tbs apple juice or milk*
1 tsp vanilla extract
1/2 C coconut
Topping: 2 Tbs additional coconut
Glaze: 1/2 C powdered sugar whisked with 1 1/2 Tbs fresh lime juice
*as in: don't go buy apple juice just for this recipe. If you don't already have some, just use milk!
Preheat oven to 350 degrees.
Whisk flour, baking soda, and salt together and set aside.
In a large mixing bowl, beat oil and sugar until blended. Add eggs and beat to combine. Add banana, sour cream or yogurt, apple juice (or milk), and vanilla. Beat until blended.
Add flour mixture and beat at a low speed until just combined. Stir in 1/2 C coconut.
Pour batter into a 9x5" loaf pan that has been sprayed with non-stick spray. Sprinkle additional 2 Tbs coconut on top.
Bake in the oven for about 1 hour or until a knife or skewer inserted in center comes out clean. Note: Check bread after about 40 minutes. If the top has browned and the coconut pieces are looking toasty, cover top of bread lightly with a piece of foil. Continue baking until done.
When done, remove pan from oven. Let cool on a cooling rack for about 10 minutes and then carefully remove from pan. Whisk powdered sugar and lime juice together for the glaze and then drizzle over top. Cool for another 15 minutes before slicing.
Tuesday, May 25, 2010
Too big, too small, just right?
I'm getting ready to create some big art on my entry way wall. Are these sizes of prints too big, too small, just right? Don't mind the fact that these are crooked and pinned up with blue tape. :) Imagine nice even lines and crisp canvas like art.


Tuesday, May 18, 2010
Restoring a Console Table
My very first furniture restoration! YEAH FOR ME! This post has lots of pictures, but I think that's only fair seeings how it was my first go at this type of project.
This project had lots of ups and downs. Thankfully the final result is a big UP, so I may actually to do another one.... someday. Here is a picture of my final pride and joy, all beautiful and shiny.

I found the original table at Goodwill for $12 WAHOO! I needed a console table with very specific dimensions for an angled wall in my family room. I wanted it to fit over the top of the awkwardly ugly subwoofer that is on that wall, so my requirements were pretty tough to shop for. When I saw this beauty I saw huge potential. The bottom legs were too short but I was confident I could take them off and find some longer ones. Gotta have faith... right?


I was really torn on whether or not to sand and stain it or just prime and paint it, which would be the easier route. At first I decided to prime and paint it. And since I never do what I decide, I went ahead and started sanding it. I sanded and sanded some more, using my hubby's electric sanding tool thing. My whole arm was in a constant state of numb vibrating aftershocks when I was done. Oh, and I took the whole thing apart before starting too.

Then I bought some stains, thinking I would go for a look I saw on All Things Thrifty.

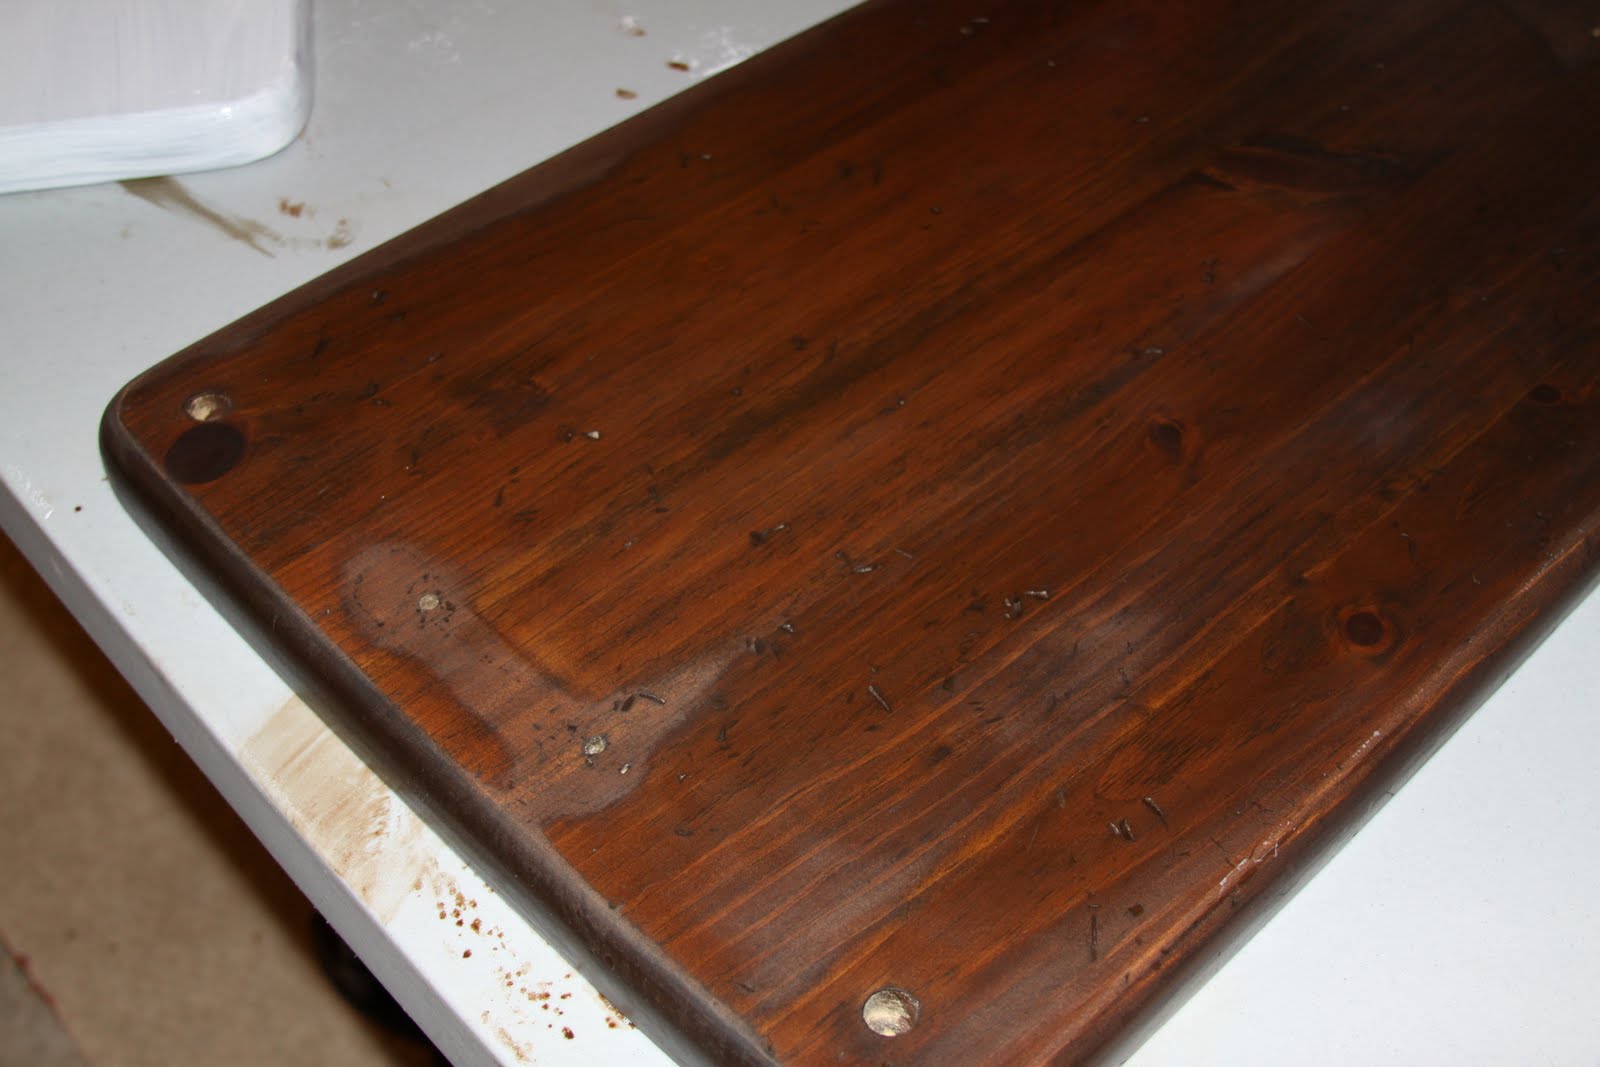
After staining I noticed that the wood was flashing. Some parts of the table were absorbing the stain differently. So I tried adding another coat of a darker stain to see if it would help. It didn't. So then I talked to my Dad, who is brilliant when it comes to anything with wood and he suggested sealing it with benite. So I did that and then stained it again. Didn't help. Staining this table had become a hopeless cause. All of the sanding, staining, restaining, sealing, and staining again took quite a bit of time. I was feeling a bit frustrated at this point.
Here is my table flashing you.

So... I went back to what I originally had decided to do. Prime and paint. But I felt a little intimidated by picking a paint color. On a whim, I posted a comment at one of my favorite blogs, Centsational Girl, and asked her for advice on painting colors. To my total surprise and delight, Kate emailed me back and offered to give me her opinion on a paint color. I sent her some pictures and she sent me back her thoughts. I totally love her style and decorating "sense", so I completely agreed with her. Go with a lighter color like cream to help brighten up the space in the room. YEAH! Thanks Kate!
I primed and then spray painted the whole thing. Spray painting was also a new adventure for me, so it was a learning process, but I think I got the hang of it in the end. I used a Satin Ivory Silk by Rust-oleum.
Oh, and I forgot to mention that I went on the hunt for new legs for the table while all this was going on. I got really lucky and found some on clearance that were just the right height and look.
All primed and ready to paint.

Spray painting... i need a workshop for stuff like this! The garage isn't ideal by any means.

After painting it ivory I knew it needed something else. So I steeled my nerves and decided to glaze it. I used this technique from All Things Thrifty. It worked perfectly. I LOVE the final look of it.

Then it was time to add my new leg brackets and screw the whole thing back together again. I was proud of myself, I did the reassembly ALL BY MYSELF. No husband. It wasn't easy either. I can take credit for this piece 100%. It's such an amazing feeling. I took about 50 pictures of the final product. But I've yet to get it all decorated in the family room space, so these pictures of it just by itself will have to suffice for now.


 I love how all the little scratches and dings from the original piece still show through. It gives it a vintage antique look that I was hoping for.
It was such a great learning experience and I know the next time will be a lot easier. It's great to know that I accomplished this and that I CAN do something like this if I want to.
This project had lots of ups and downs. Thankfully the final result is a big UP, so I may actually to do another one.... someday. Here is a picture of my final pride and joy, all beautiful and shiny.

I found the original table at Goodwill for $12 WAHOO! I needed a console table with very specific dimensions for an angled wall in my family room. I wanted it to fit over the top of the awkwardly ugly subwoofer that is on that wall, so my requirements were pretty tough to shop for. When I saw this beauty I saw huge potential. The bottom legs were too short but I was confident I could take them off and find some longer ones. Gotta have faith... right?


I was really torn on whether or not to sand and stain it or just prime and paint it, which would be the easier route. At first I decided to prime and paint it. And since I never do what I decide, I went ahead and started sanding it. I sanded and sanded some more, using my hubby's electric sanding tool thing. My whole arm was in a constant state of numb vibrating aftershocks when I was done. Oh, and I took the whole thing apart before starting too.

Then I bought some stains, thinking I would go for a look I saw on All Things Thrifty.

After staining I noticed that the wood was flashing. Some parts of the table were absorbing the stain differently. So I tried adding another coat of a darker stain to see if it would help. It didn't. So then I talked to my Dad, who is brilliant when it comes to anything with wood and he suggested sealing it with benite. So I did that and then stained it again. Didn't help. Staining this table had become a hopeless cause. All of the sanding, staining, restaining, sealing, and staining again took quite a bit of time. I was feeling a bit frustrated at this point.
Here is my table flashing you.
So... I went back to what I originally had decided to do. Prime and paint. But I felt a little intimidated by picking a paint color. On a whim, I posted a comment at one of my favorite blogs, Centsational Girl, and asked her for advice on painting colors. To my total surprise and delight, Kate emailed me back and offered to give me her opinion on a paint color. I sent her some pictures and she sent me back her thoughts. I totally love her style and decorating "sense", so I completely agreed with her. Go with a lighter color like cream to help brighten up the space in the room. YEAH! Thanks Kate!
I primed and then spray painted the whole thing. Spray painting was also a new adventure for me, so it was a learning process, but I think I got the hang of it in the end. I used a Satin Ivory Silk by Rust-oleum.
Oh, and I forgot to mention that I went on the hunt for new legs for the table while all this was going on. I got really lucky and found some on clearance that were just the right height and look.
All primed and ready to paint.

Spray painting... i need a workshop for stuff like this! The garage isn't ideal by any means.

After painting it ivory I knew it needed something else. So I steeled my nerves and decided to glaze it. I used this technique from All Things Thrifty. It worked perfectly. I LOVE the final look of it.

Then it was time to add my new leg brackets and screw the whole thing back together again. I was proud of myself, I did the reassembly ALL BY MYSELF. No husband. It wasn't easy either. I can take credit for this piece 100%. It's such an amazing feeling. I took about 50 pictures of the final product. But I've yet to get it all decorated in the family room space, so these pictures of it just by itself will have to suffice for now.


It was such a great learning experience and I know the next time will be a lot easier. It's great to know that I accomplished this and that I CAN do something like this if I want to.
Sunday, May 16, 2010
Chair Graveyard
I have a REALLY fancy dining room. I've been in the middle of finishing up my family room/kitchen nook/kitchen redecorating project, and in an effort to make that space better I swapped out my dining tables. The nicer table from the dining room was moved into the kitchen nook and the piece of junk oak table we've had for 10 years got moved into the formal dining room.
I figured the formal living and dining room were already a junk fest of furniture, so why not add to the lovelines with an oak table? I'm also trying to recover some new (used) barstools for the kitchen so I frequently am moving the old ugly bar stools out of my way and storing them in the formal dining room. Poor room, it's become a chair graveyard.
Maybe someday I'll take pity on this room and decorate it. But for now it will remain ugly and a great place to store unwanted and ugly chairs.

I figured the formal living and dining room were already a junk fest of furniture, so why not add to the lovelines with an oak table? I'm also trying to recover some new (used) barstools for the kitchen so I frequently am moving the old ugly bar stools out of my way and storing them in the formal dining room. Poor room, it's become a chair graveyard.
Maybe someday I'll take pity on this room and decorate it. But for now it will remain ugly and a great place to store unwanted and ugly chairs.

Friday, May 14, 2010
Knit Skirts - Mommy and Daughter
I am SO behind on posting stuff to this blog. It's not that I haven't been crafting or cooking stuff, it's just that I've been too busy to post about them. I'm going to make an attempt to catch up over the next week or two.
First on the list is a pair of skirts I made out of the knit fabric I bought awhile back. Addison gave her first talk in church about 5 weeks ago and I wanted to make sure she had something new and fun to wear for it. So I made her this little skirt and then decided to make one for myself too. I desperately need more skirts, and this was SO simple to make, so it was fun to do the whole "mommy daughter matchy" thing for once. I actually think this may be the first time I've ever matched clothes with her! And I don't care if it's cheesy, cause I loved it and she loved it and it was perfect.

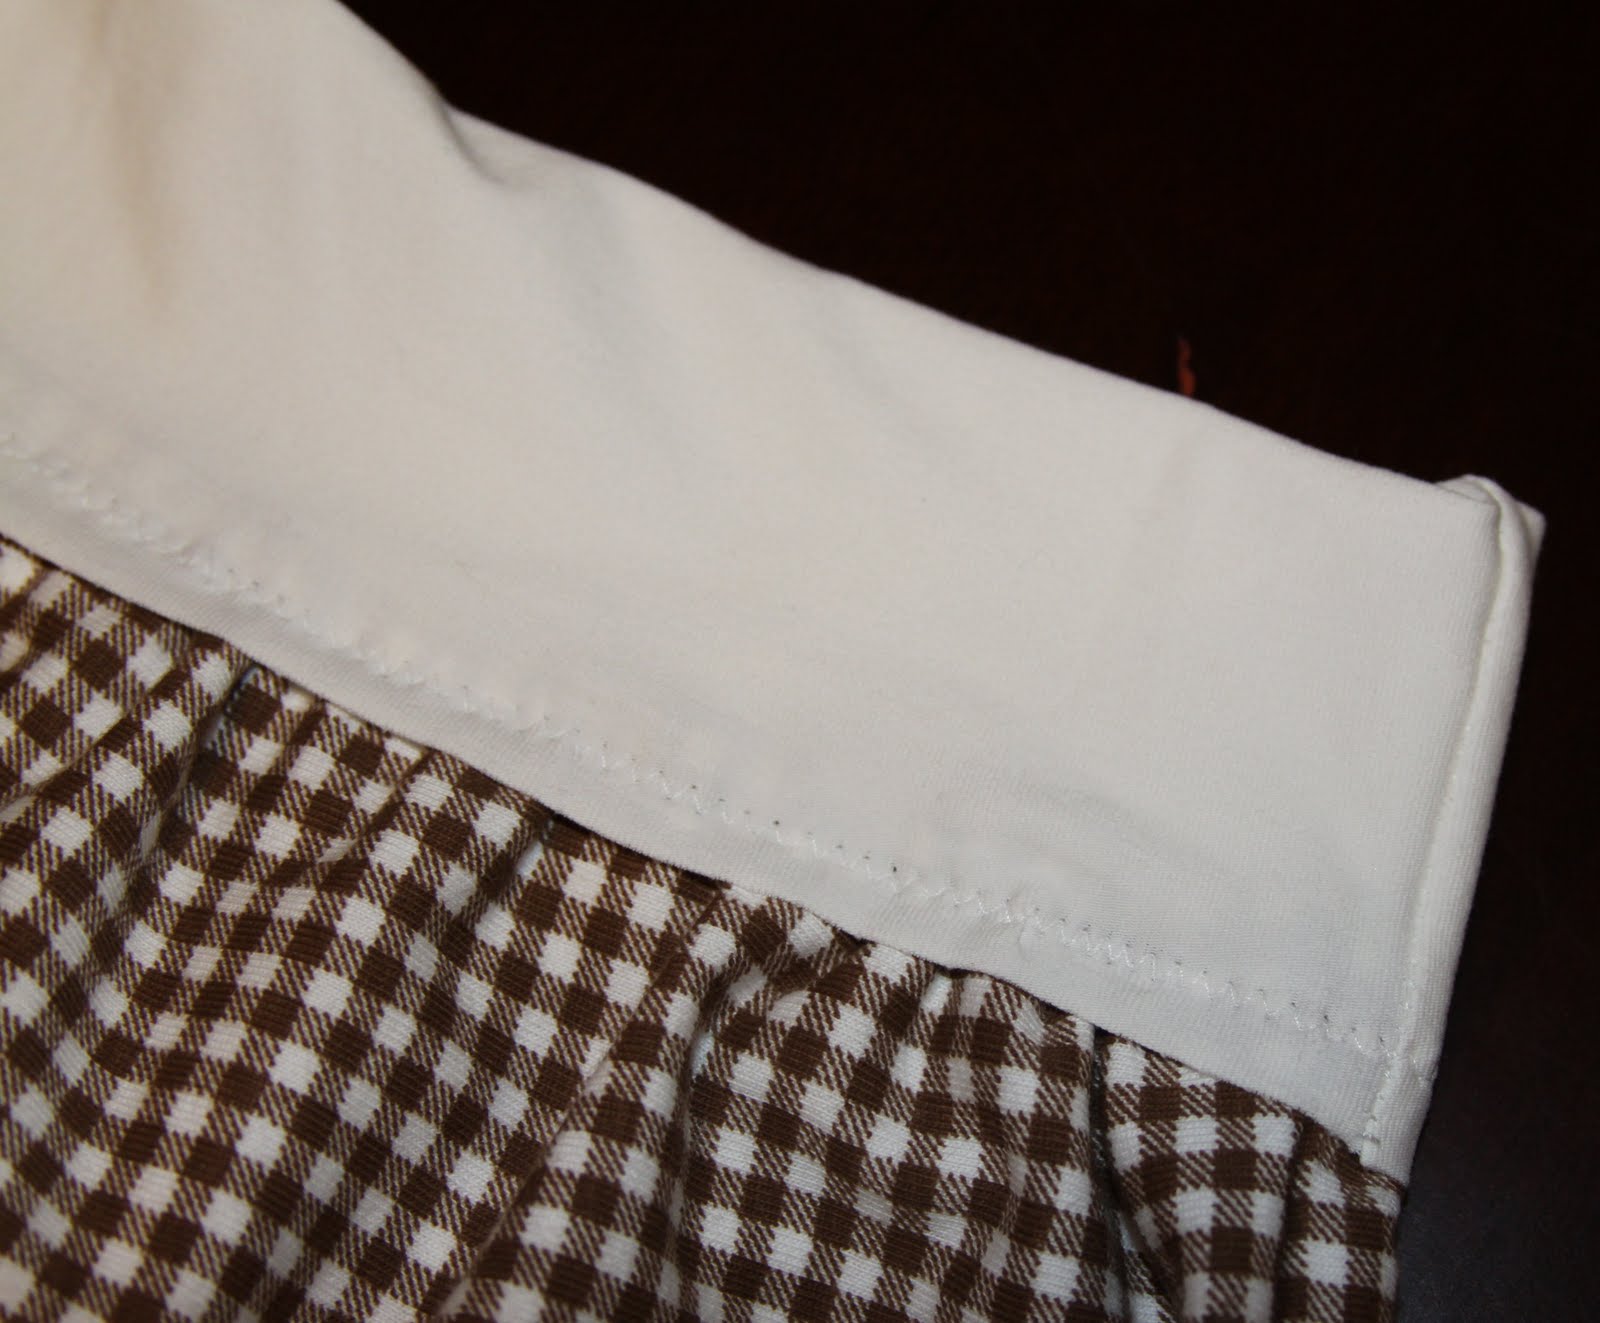
 The waistband didn't turn out perfect, but you honestly can't see it when you have a cute shirt over it.

And here are a few pictures of the two of us in our skirts later that day. I'm sad we didn't think to take one right after church, but oh well. This first one is mostly a cute picture of Austin, but you can kinda see Addison and I on the side. :o)


I will most likely be making more of these as summer approaches. They are perfect for hot weather and the most comfy thing I own. And I'll just go ahead and keep making matchy ones for Addison while I'm at it. :o)
First on the list is a pair of skirts I made out of the knit fabric I bought awhile back. Addison gave her first talk in church about 5 weeks ago and I wanted to make sure she had something new and fun to wear for it. So I made her this little skirt and then decided to make one for myself too. I desperately need more skirts, and this was SO simple to make, so it was fun to do the whole "mommy daughter matchy" thing for once. I actually think this may be the first time I've ever matched clothes with her! And I don't care if it's cheesy, cause I loved it and she loved it and it was perfect.


And here are a few pictures of the two of us in our skirts later that day. I'm sad we didn't think to take one right after church, but oh well. This first one is mostly a cute picture of Austin, but you can kinda see Addison and I on the side. :o)


I will most likely be making more of these as summer approaches. They are perfect for hot weather and the most comfy thing I own. And I'll just go ahead and keep making matchy ones for Addison while I'm at it. :o)
Thursday, May 6, 2010
Homemade Pizza Sauce Recipe
Homemade pizzas are a regular item on the menu at our house. I make the dough from scratch and we usually like the traditional tomato based sauce and toppings. Every now and then I'll deviate from the traditional and make DJ and I something with a different sauce and topping, but the tomato sauce is our favorite by far. Since we do go through a lot of pizza sauce, I decided to come up with my own recipe and make a huge batch of it and pressure can it.
I bought a pressure canner/cooker a couple months ago and have used it a couple times. It's a bit intimidating at first, but it sure does what it's suppose to and it's a great feeling to know that you've cooked and preserved fresh meals that will last on your shelves for a long time. It's awesome for those days that you just don't have it in ya to cook.
Here was my first successful batch of pressure canned jars of turkey chili. So cool!

Anyway, back to the reason for this post. I used several recipes as the base for my final pizza sauce concoction and it turned out pretty dang yummy. It can be doubled, tripled, quadrupled, etc. to make as much as you need.
Homemade Pizza Sauce
1 14.5 ounce can of diced tomatoes
1 6 ounce can of tomato paste
3 TBS of fresh grated Parmesan cheese
1 1/2 tsp onion powder
1 tsp garlic salt
1 tsp orageno
1 1/2 tsp Italian seasoning
1/4 tsp garlic powder
You can vary any of these seasoning to your taste preference. Put all the ingredients into a food processor or blender and mix until it reaches your desired consistency. We like a thinner sauce, so I let my food processor run for about a minute. And that's it! Spread on your dough for pizzas or this would make a fantastic bread stick dipping sauce.
ENJOY!
I bought a pressure canner/cooker a couple months ago and have used it a couple times. It's a bit intimidating at first, but it sure does what it's suppose to and it's a great feeling to know that you've cooked and preserved fresh meals that will last on your shelves for a long time. It's awesome for those days that you just don't have it in ya to cook.
Here was my first successful batch of pressure canned jars of turkey chili. So cool!

Anyway, back to the reason for this post. I used several recipes as the base for my final pizza sauce concoction and it turned out pretty dang yummy. It can be doubled, tripled, quadrupled, etc. to make as much as you need.
Homemade Pizza Sauce
1 14.5 ounce can of diced tomatoes
1 6 ounce can of tomato paste
3 TBS of fresh grated Parmesan cheese
1 1/2 tsp onion powder
1 tsp garlic salt
1 tsp orageno
1 1/2 tsp Italian seasoning
1/4 tsp garlic powder
You can vary any of these seasoning to your taste preference. Put all the ingredients into a food processor or blender and mix until it reaches your desired consistency. We like a thinner sauce, so I let my food processor run for about a minute. And that's it! Spread on your dough for pizzas or this would make a fantastic bread stick dipping sauce.
ENJOY!
Subscribe to:
Posts (Atom)