Showing posts with label Interior Decorating. Show all posts

Tuesday, May 25, 2010

Too big, too small, just right?

I'm getting ready to create some big art on my entry way wall.  Are these sizes of prints too big, too small, just right?  Don't mind the fact that these are crooked and pinned up with blue tape. :)  Imagine nice even lines and crisp canvas like art.


Tuesday, May 18, 2010

Restoring a Console Table

My very first furniture restoration!  YEAH FOR ME!  This post has lots of pictures, but I think that's only fair seeings how it was my first go at this type of project.

This project had lots of ups and downs.  Thankfully the final result is a big UP, so I may actually to do another one.... someday.  Here is a picture of my final pride and joy, all beautiful and shiny.


I found the original table at Goodwill for $12   WAHOO!  I needed a console table with very specific dimensions for an angled wall in my family room.  I wanted it to fit over the top of the awkwardly ugly subwoofer that is on that wall, so my requirements were pretty tough to shop for.  When I saw this beauty I saw huge potential.  The bottom legs were too short but I was confident I could take them off and find some longer ones.  Gotta have faith... right?


I was really torn on whether or not to sand and stain it or just prime and paint it, which would be the easier route.  At first I decided to prime and paint it.  And since I never do what I decide, I went ahead and started sanding it.  I sanded and sanded some more, using my hubby's electric sanding tool thing.  My whole arm was in a constant state of numb vibrating aftershocks when I was done.  Oh, and I took the whole thing apart before starting too.


Then I bought some stains, thinking I would go for a look I saw on All Things Thrifty


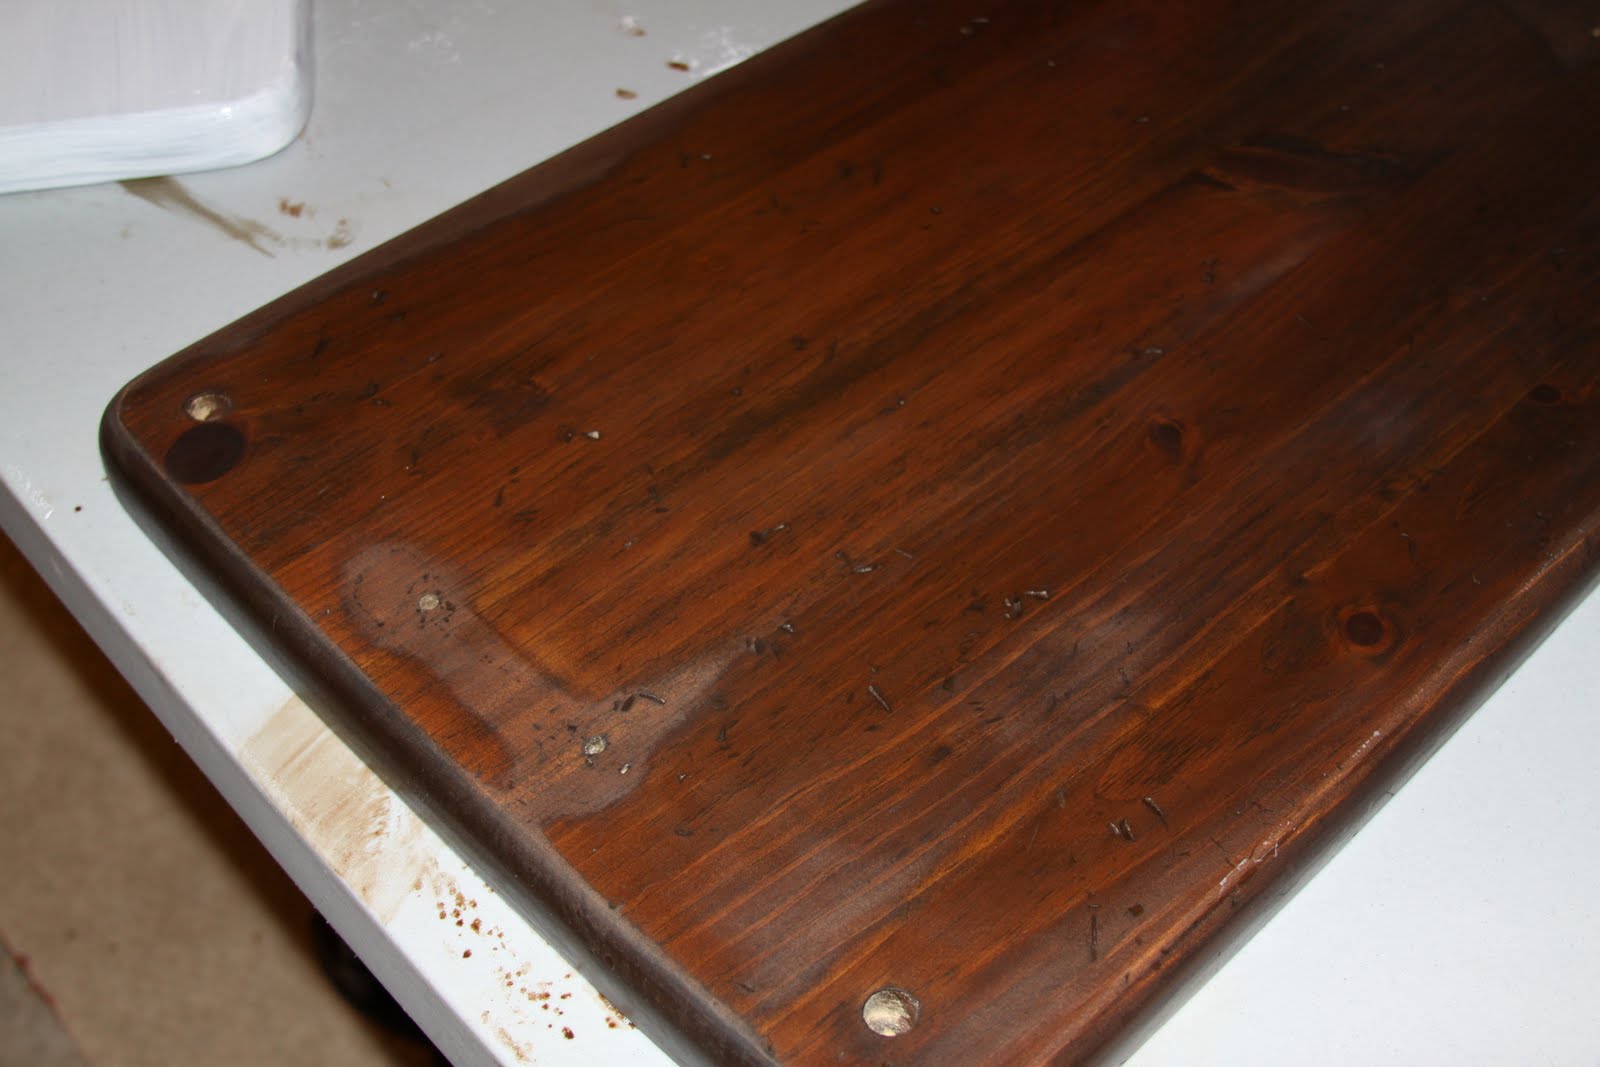
After staining I noticed that the wood was flashing.  Some parts of the table were absorbing the stain differently.  So I tried adding another coat of a darker stain to see if it would help.  It didn't.  So then I talked to my Dad, who is brilliant when it comes to anything with wood and he suggested sealing it with benite.  So I did that and then stained it again.  Didn't help.  Staining this table had become a hopeless cause.  All of the sanding, staining, restaining, sealing, and staining again took quite a bit of time.  I was feeling a bit frustrated at this point.

Here is my table flashing you.

So... I went back to what I originally had decided to do.  Prime and paint.  But I felt a little intimidated by picking a paint color.  On a whim, I posted a comment at one of my favorite blogs, Centsational Girl, and asked her for advice on painting colors.  To my total surprise and delight, Kate emailed me back and offered to give me her opinion on a paint color.  I sent her some pictures and she sent me back her thoughts.  I totally love her style and decorating "sense", so I completely agreed with her.  Go with a lighter color like cream to help brighten up the space in the room.  YEAH!  Thanks Kate!

I primed and then spray painted the whole thing.  Spray painting was also a new adventure for me, so it was a learning process, but I think I got the hang of it in the end.  I used a Satin Ivory Silk by Rust-oleum.

Oh, and I forgot to mention that I went on the hunt for new legs for the table while all this was going on.  I got really lucky and found some on clearance that were just the right height and look.

All primed and ready to paint.

Spray painting... i need a workshop for stuff like this!  The garage isn't ideal by any means.


After painting it ivory I knew it needed something else.  So I steeled my nerves and decided to glaze it.  I used this technique from All Things Thrifty. It worked perfectly.  I LOVE the final look of it.


Then it was time to add my new leg brackets and screw the whole thing back together again.  I was proud of myself, I did the reassembly ALL BY MYSELF.  No husband.  It wasn't easy either.  I can take credit for this piece 100%.  It's such an amazing feeling.  I took about 50 pictures of the final product.  But I've yet to get it all decorated in the family room space, so these pictures of it just by itself will have to suffice for now.

I love how all the little scratches and dings from the original piece still show through.  It gives it a vintage antique look that I was hoping for.

It was such a great learning experience and I know the next time will be a lot easier.  It's great to know that I accomplished this and that I CAN do something like this if I want to.

Sunday, May 16, 2010

Chair Graveyard

I have a REALLY fancy dining room.  I've been in the middle of finishing up my family room/kitchen nook/kitchen redecorating project, and in an effort to make that space better I swapped out my dining tables.  The nicer table from the dining room was moved into the kitchen nook and the piece of junk oak table we've had for 10 years got moved into the formal dining room.

I figured the formal living and dining room were already a junk fest of furniture, so why not add to the lovelines with an oak table?  I'm also trying to recover some new (used) barstools for the kitchen so I frequently am moving the old ugly bar stools out of my way and storing them in the formal dining room.  Poor room, it's become a chair graveyard.

Maybe someday I'll take pity on this room and decorate it.  But for now it will remain ugly and a great place to store unwanted and ugly chairs.

Wednesday, March 31, 2010

Making Pillows - How To, Tips, Lessons Learned

This is a long post, but has some good info and lots of pics, so bear with me. :o) The past couple months I've been making pillows for my family room as part of my effort to decorate that area of the house.  The family room is the first of MANY rooms I need to decorate, and it was a good starting point for me to get my feet wet in things unknown.  So, this post is about my adventures in pillow making.

Pillows are very simple and straightforward, but like with anything, they can have their rocky parts and parts that made me want to pull my hair out.  I made the gathered pillow first, which probably wasn't very smart since it was my most complex one, but at least everything afterward was easier.

I made 5 regular square pillows, one gathered pillow, one 4 piece panel front pillow (no idea what it's called) and one long rectangle pin tuck pillow.

I did a TON of reading and researching online to try and find the best pillow tutorials.  I didn't want the envelope pillows, so there weren't as many regular back pillow tutorials out there.  Here are some of the ones that I loosely followed:

For the 4 panel pillow: Sew4Home, Corduroy Diamond Wale Pillow 

For the regular square pillows: Sew4Home, Perky Pom Pom Pillow (minus the pom pom part) AND Make It and Love It, Pillow Slip Covers (minus the envelop part in the back)

For the pin tuck pillow: All Things Thrifty, Pin Tuck Pillow

For learning how to slip stitch the openings closed: Taffy Talk, Invisible Closing Seam

 Here are some close ups of the 4 panel pillow and the gathered pillow in back.

One of the square pillows in back, with the 4 panel pillow in front.

Four of the regular square pillows with the pin tuck pillow in the middle. Man my pictures are terrible.  I need a new camera!  ARG!

And now for a few things I learned along the way...
  • If you opt to stuff your pillow with batting, then the type of batting really does matter.  No where in any of the reading I did, did I find info on batting.  The first bags I bought were the cheapest kind, but also seemed to be the most popular since there were huge bins of them in the craft store.  After stuffing two pillows with them, my husband said they weren't comfy at all and suggested I find something else for the next ones.  So I went back and bought the nicest kind with a touch of silk in it, and it made a HUGE difference.  They are a lot more conducive to laying on while stretched out on the couch.  I guess if your pillows were strictly for viewing pleasure, then the cheap stuff would be fine.  But if you plan to use the pillows then go with the nicer stuff.
  • If you opt to go with a pillow insert, then make sure you measure exactly right and have a fabric that doesn't shift or do funny things to you while you sew.  The inserts scared me because if I made any errors in sizing then I was hosed.  
  • Tissue paper for gift wrapping makes a great predone pattern for pillows (the square sheet kind).
  • Ironing out the seams of the pillow can be the most time consuming part of pillow making.  It's also my least favorite part.  If you have a fabric that really shows the creases of the ironed seam, then it takes a lot of patience at the ironing board to roll the seam just right before pressing.  I made the mistake of not fulling rolling out the seam when I was pressing it and after I got the pillow all stuffed and sewn up, it looked awful and I redid the whole thing (seam ripper, pulled out the batting, reironed...). NOT FUN.
  • Take your time when slip stitching the opening closed.  It's not hard once you get the hang of it, but it will look a ton better if you take your time and do a neat job. I do this while watching all my mindless shows on TV at night.
  • And most important, don't be afraid to try something new and have fun with it.  Pillows really are a great avenue for trying out a new technique or getting creative.  There isn't a huge commitment when pillow making, so if you mess up, you can toss it. :) 
Last but not least, are some pictures of how I made the pin tuck pillow.  I mentioned above that I used the tutorial at All Things Thrifty, but I really only used it for the concept and then ventured out on my own into uncharted waters.  I think the final result was cute and fit with the rest of the pillows nicely.

I laid out my fabric for the front of my pin tuck pillow and then on the back side made pen marks where I wanted the tucks to be.  Then I used a small amount of the thread to tightly tie each gathered tuck.

A close up of the little pin tucked "nobs" after I tied them with thread.

This next step I wasn't totally sure about, so I just winged it.  I had to use needle and thread to sew the "nobs" in place securely.  I just knotted the end of my thread and then started sewing it back and forth through the center of the nob about a dozen times.  I gave it a good tug on the front side to make sure it was secure and then just tied off the end.  Totally unprofessional method, but it worked perfectly.

So here is a picture of the back side of my fabric all tied off and ready to go.

And this is what it looked like when I flipped it over.  Kind of a neat affect!  At this point I wasn't sure WHAT to do next, so I improvised. 

I cut and laid out a piece of muslin on the wrong side of the pin tucked panel.  Then I pinned the muslin to the panel, careful to fold and tuck the creases just how I wanted them.  It definitely wasn't perfect, but I was going for more of a "natural" look so it worked out fine.

You can see my piece of muslin is much larger than the fabric panel.  I intentionally did this because I knew the fabric was going to move around once I started sewing the two pieces together and sure enough, it did.  Once I pinned and sewed all four sides to the muslin I just went back and trimmed off the excess muslin to create a nice finished look.  Again, totally unprofessional. :)

Then I cut a back piece out of a coordinating fabric and sewed the two pieces together, right sides together, leaving about 8 inches open for the batting.  I clipped the corners, turned it right side out and pushed out the corners to give them a more sharp edge. Then I pressed the whole thing and stuffed with batting.

Then I pinned the 8" opening closed and slip stitched shut.

Ta Da!  A very unique pillow that fits perfectly as the final piece in my family room pillow makeover.

PHEW!  
I'm excited about how it all turned out and am ready to move onto my next project in the family room... stay tuned for some projects that will have me sanding, hammering, and painting in the garage.   
YIKES!

I've linked up to Amy Lou Who Sew & Tell
AND
V and Co. 

Monday, February 15, 2010

Family Room Curtains

I've been done with these curtains for a few weeks now but just haven't gotten around to posting them.  I was trying to see if my lighting would improve to take a better picture, but it never did.  During the winter the sun is so low in the sky that it doesn't shine directly into this particular window very well.  We get plenty of daylight of course, but not the direct light.

So the pictures are a bit dark and make the flash on my camera go off and, in turn, make the curtains look bright orange.  The true color of this fabric is a bronze/gold with deep red undertones.  They match the red couches so well and I absolutely love the feel they bring to the room.  They make it feel more cozy and warm and inviting, while adding a touch of class. Plus the hide the hideous cords from the blinds, wahoo!  Now if I can just finish making the pillows for the couch, redecorate over the fireplace and figure out how to do the lighting in the room, I'd have a room completely finished... I guess that's what "tomorrow" is for. :)

A big thank you to Ashley at Make It and Love It for the tutorial on these curtains.  I obviously doubled it to make two panels, but everything else I followed exactly.  The sewing part was very simple.  The hardest part about curtain making is the sheer size of the project.  Laying out, cutting, pinning and ironing 8 foot panels is no small task.  But now that I've done it once it will be easier the next go around and I'm exciting for the day when I get to start working on my living and dining room curtains.

This last picture was my attempt to not use a flash. It turned out terrible but at least the color is slightly closer to the real deal.  I'll just have to retake some in the summer. 

Tuesday, January 19, 2010

Gathered Accent Pillow - What Was I Thinking?

I went on a hunt about a week ago for the perfect curtain material for our family room and since Hancock Fabric was having a 40% off upholstery and drapery sale I wanted to get fabric for accent pillows as well. After a LOT of browsing and putting fabric bolts in and out of my cart, I settled on three fabrics for pillows (1 main solid color and 2 accent colors) and found the perfect curtain fabric as well.  And through some crazy fluke in their pricing system, I got the 5 1/2 yards of dupioni silk fabric for my curtains at .50 cents a yard.  Yes, you read that correctly, I bought my curtains for $2.75!  I'm still in shock.

My main fabric for the pillows is a soft faux suede/corduroy mix.  One of the other fabrics is a lightweight, shimmery sort of rayon type of material.  The lady at Hancocks warned me that it might be tricky to sew.  Yeah sure, whatever lady...

Now what to do with these pillow fabrics? Over at Make It and Love It, Ashley provided a tutorial for a gathered pillow that I thought was the perfect solution for my shimmery (slippery) fabric.  Her pillow turned out so dang cute and I wanted that look for my couch.  So I dove in.

Things I've learned from this sewing project: 
#1. Listen to the ladies at the fabric stores, they know what they're talking about. 
#2. Don't make the most complex pillow out there as your first pillow (especially when you've never sewn a gathering stitch in your life). 
#3. Patience is a virtue.
#4. Shimmery, lightweight fabric is not ideal for gathered pillows and can cause excessive mumbled swear words on more than one occasion.
#5. I like to take on more than should - Wait, I already knew this... that one doesn't count.
#6. I still am psyched about sewing and trying new things, despite my frustrated efforts at a gathered pillow!

Here are some pictures of my work along the way and then the final result.


Look how pretty it shines in the lights!  HA! (grumble grumble)


I've sewn all the gather seems here and pinned the top.


Here I'm half way through sewing the gather seems to the lining.  This was the most tricky part of the whole project and took the longest.


All the seams are sewn to the lining now... almost there.


Couple of angles from the front.  And then a shot of the back which doesn't look nearly as pretty. And then one last shot close up of the gathers.  Hopefully no one looks too closely at this pillow because my stitches are all over the place!


Didn't turn out quite as cute as Ashley's but I still like it and think it will help tie all the other fabrics in the room together.  SO GLAD I'm done with this one.  Probably won't be attempting it again anytime soon.  But one things for sure, I'm a pro at gathering now and it won't be intimidated by cute gathered skirts for Addison any longer!

Friday, January 8, 2010

Decorating My House - Getting Motivated

I really struggle with interior decorating.  My house is SO bland that it can sometimes get depressing.  I just really don't have a knack for coming up with cute ideas and can never seem to find the right things at the stores around here.  But I'm committing right here and now to start trying.  Some of this new found motivation is thanks to Ashley over at Make It and Love It.  She is starting a new Decorate My Home series and I'm going to use as many ideas of hers as I can.  She's got really cute ideas and always has great tutorials.

I think the winter is a great time to focus on decorating and any remodeling projects because usually January through May is a slower time, no vacations, too cold to go outside, etc.  If you decide to jump on the bandwagon and do some interior decorating yourself I'd love to hear about it!

With that being said, I'm going to tackle some curtains for the rooms in the downstairs part of my house.  Stay tuned for pictures of new curtains with, hopefully, semi-straight hem lines.