Wednesday, April 28, 2010

Slower Cooker Shredded BBQ Beef on Homemade Whole Wheat Buns

It's been quite some time since I wrote about food, or about anything for that matter.  I guess I've succumbed to the craziness of life lately.  But tonight I just wanted to share a super easy and delicious meal that we just finished devouring and I just finished cleaning up.  Man is it a lot of work to feed a family of 5 three times a day. PHEW!

I get the base for my BBQ Beef recipe on Allrecipes.com, from this entry by someone named Kathy.  I also use Allrecipes.com for the base of my Whole Wheat Sandwich Rolls.  Here are my customized versions of the recipes, which are both a super big hit with the family.


Slow Cooker Shredded BBQ Beef

3 tablespoons all-purpose flour
3 pounds chuck roast
1 bottle of your favorite BBQ sauce
1/2 of a large sweet onion, chopped
1/3 cup brown sugar
2 cubes beef bouillon
1 1/2 teaspoons chili powder
2 cloves garlic, minced
1 teaspoon mustard powder
2 TBS Worcestershire sauce

1. Put the beef into the crock pot and sprinkle with the flour.  Add all the other ingredients on top of the beef.  Try to stir everything up as best you can, or give it an hour to meld together and then stir. Cover and cook on high for 8 hours or low for 14 hours.  If I'm home I like to give the sauce a stir once in a while, basting the meat, but it's not absolutely necessary.
 
2. At the end of the cooking time take the piece of beef out and shred with a fork (remove any large pieces of fat and discard).  Put the shredded beef back into the crock pot and stir to incorporate with the bubbly BBQ sauce.  Serve on homemade whole wheat buns (below), or with your favorite sandwich bread and a few slices of cheese.

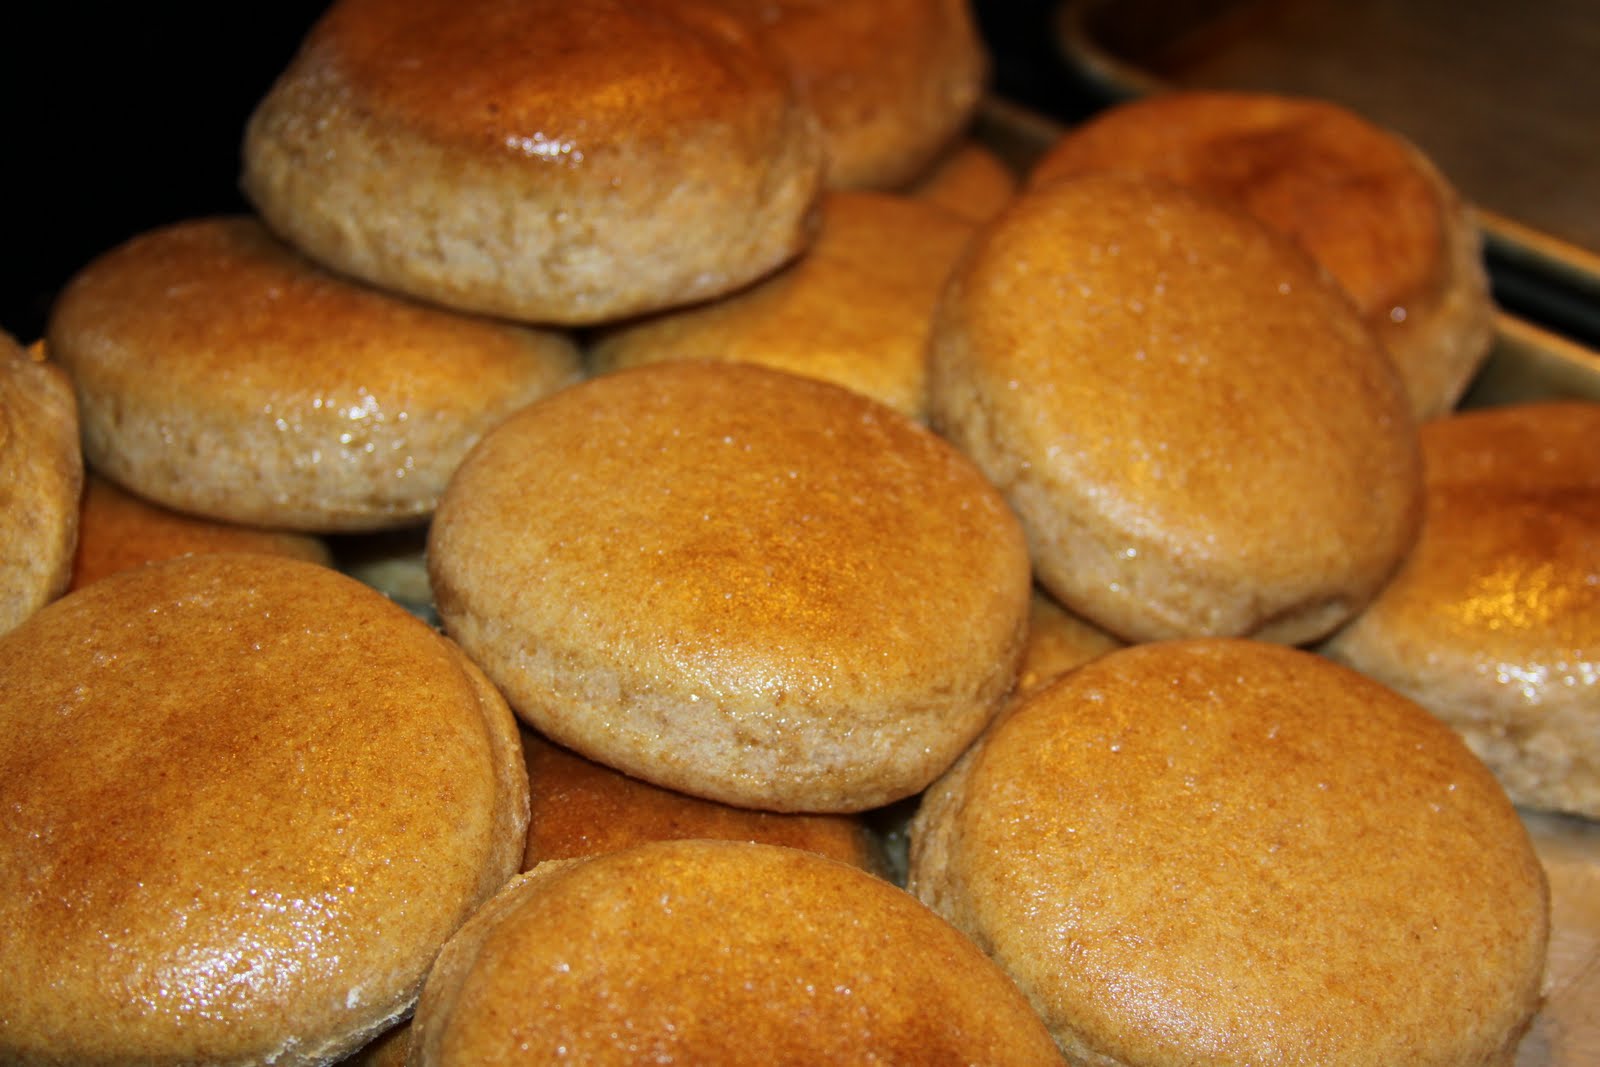
Homemade Whole Wheat Sandwich Rolls

1 1/4 cups warm milk
1/4 cup honey
1 egg, beaten
2 tablespoons coconut oil OR butter, softened
3/4 teaspoon salt
2 3/4 cups whole wheat flour
1 cup bread flour
1 1/2 teaspoons bread machine yeast

2 tablespoons butter, to baste on top of hot rolls

1. Place the warmed milk and honey into a large bowl.  Add the yeast and let proof (sit) for 10 minutes.  While waiting, combine the two types of flour and salt in a separate bowl and set aside.


2. Add the coconut oil (or butter) and the beaten egg to the proofed yeast mixture and combine. If you are using a stand mixer, use your dough hook to mix everything together.  If you are going to be kneading by hand then just combine with a wooden spoon.

3. Add the flour mixture to your wet ingredients a cup at a time, combining well between each cup.  Once all the flour is incorporated let the stand mixer knead the dough for 7-10 minutes or if doing it by hand then I think it would be about 20 minutes of kneading.  I always seem to need a little more flour, but that could be just the humidity here.  You'll have to judge whether or not your dough needs more as it's kneading.

4.  Turn the dough into a lighted oiled bowl and then cover and let rise until doubled.  After doubled, punch down the dough and turn dough out onto a lightly floured surface and roll out 3/4 inch thick. Cut out rolls with a 3 to 4 inch diameter biscuit cutter. Place on lightly greased cookie sheets; cover and let rise until doubled, about 1 hour.  If you want to make dinner rolls instead of sandwich rolls then you can shape the dough into rolls and place on the pan to rise.  I've done both ways and they turn out fantastic no matter how they look.

5. Meanwhile, preheat oven to 350 degrees F (175 degrees C).  Bake in preheated oven for 10 to 15 minutes. When rolls are finished baking, smear with butter. 

I serve these BBQ Beef sandwiches with sweet potato fries and a big fruit salad.  A great spring/summer meal to come home to after work.  It's even better if you make the buns the night before.  And I always double my roll batch so that I have enough to last for a few days or freeze for later.  Super easy!

I hope you get the chance to try out these recipes, they are so delicious!

Thursday, April 15, 2010

Bow Hair Clip Holder/Organizer and Flower Clips

I had to come up with a gift for a girls birthday party with one day notice.  Normally I would run to Fred Meyer, but the kids have been having a rough week and I didn't want to drag them out.  So I used what I had on hand and came up with a gift that hopefully was fun for her.  I used a spare frame I had, and mod podged it with some bright pink fabric.  Then I covered the glass with some coordinating knit fabric and hot glued the ribbons to the front.  I used this tutorial from Make It and Love It.

Then I made a couple of flower clips using the same coordinating fabrics and little pink beads.  I used this tutorial as my guide, although I hit some snags when it came time to attach the clips to the flowers.  There are NO good tutorials out there that explain how to do this without using hot glue.  I have some hot glue gunned clips and they just never hold up over time.  So I wanted to sew them onto the flowers and I had to just wing it.  I eventually got it to work, yeah!

The pictures I took are all terrible, my apologies once again! :)

I did enjoy making the little clips so I think I'll add making some for Addison to my ridiculous to do project list.  Linking up with SEW AND TELL over at Amy Lou Who this week.  Yeah!

Wednesday, March 31, 2010

Making Pillows - How To, Tips, Lessons Learned

This is a long post, but has some good info and lots of pics, so bear with me. :o) The past couple months I've been making pillows for my family room as part of my effort to decorate that area of the house.  The family room is the first of MANY rooms I need to decorate, and it was a good starting point for me to get my feet wet in things unknown.  So, this post is about my adventures in pillow making.

Pillows are very simple and straightforward, but like with anything, they can have their rocky parts and parts that made me want to pull my hair out.  I made the gathered pillow first, which probably wasn't very smart since it was my most complex one, but at least everything afterward was easier.

I made 5 regular square pillows, one gathered pillow, one 4 piece panel front pillow (no idea what it's called) and one long rectangle pin tuck pillow.

I did a TON of reading and researching online to try and find the best pillow tutorials.  I didn't want the envelope pillows, so there weren't as many regular back pillow tutorials out there.  Here are some of the ones that I loosely followed:

For the 4 panel pillow: Sew4Home, Corduroy Diamond Wale Pillow 

For the regular square pillows: Sew4Home, Perky Pom Pom Pillow (minus the pom pom part) AND Make It and Love It, Pillow Slip Covers (minus the envelop part in the back)

For the pin tuck pillow: All Things Thrifty, Pin Tuck Pillow

For learning how to slip stitch the openings closed: Taffy Talk, Invisible Closing Seam

 Here are some close ups of the 4 panel pillow and the gathered pillow in back.

One of the square pillows in back, with the 4 panel pillow in front.

Four of the regular square pillows with the pin tuck pillow in the middle. Man my pictures are terrible.  I need a new camera!  ARG!

And now for a few things I learned along the way...
  • If you opt to stuff your pillow with batting, then the type of batting really does matter.  No where in any of the reading I did, did I find info on batting.  The first bags I bought were the cheapest kind, but also seemed to be the most popular since there were huge bins of them in the craft store.  After stuffing two pillows with them, my husband said they weren't comfy at all and suggested I find something else for the next ones.  So I went back and bought the nicest kind with a touch of silk in it, and it made a HUGE difference.  They are a lot more conducive to laying on while stretched out on the couch.  I guess if your pillows were strictly for viewing pleasure, then the cheap stuff would be fine.  But if you plan to use the pillows then go with the nicer stuff.
  • If you opt to go with a pillow insert, then make sure you measure exactly right and have a fabric that doesn't shift or do funny things to you while you sew.  The inserts scared me because if I made any errors in sizing then I was hosed.  
  • Tissue paper for gift wrapping makes a great predone pattern for pillows (the square sheet kind).
  • Ironing out the seams of the pillow can be the most time consuming part of pillow making.  It's also my least favorite part.  If you have a fabric that really shows the creases of the ironed seam, then it takes a lot of patience at the ironing board to roll the seam just right before pressing.  I made the mistake of not fulling rolling out the seam when I was pressing it and after I got the pillow all stuffed and sewn up, it looked awful and I redid the whole thing (seam ripper, pulled out the batting, reironed...). NOT FUN.
  • Take your time when slip stitching the opening closed.  It's not hard once you get the hang of it, but it will look a ton better if you take your time and do a neat job. I do this while watching all my mindless shows on TV at night.
  • And most important, don't be afraid to try something new and have fun with it.  Pillows really are a great avenue for trying out a new technique or getting creative.  There isn't a huge commitment when pillow making, so if you mess up, you can toss it. :) 
Last but not least, are some pictures of how I made the pin tuck pillow.  I mentioned above that I used the tutorial at All Things Thrifty, but I really only used it for the concept and then ventured out on my own into uncharted waters.  I think the final result was cute and fit with the rest of the pillows nicely.

I laid out my fabric for the front of my pin tuck pillow and then on the back side made pen marks where I wanted the tucks to be.  Then I used a small amount of the thread to tightly tie each gathered tuck.

A close up of the little pin tucked "nobs" after I tied them with thread.

This next step I wasn't totally sure about, so I just winged it.  I had to use needle and thread to sew the "nobs" in place securely.  I just knotted the end of my thread and then started sewing it back and forth through the center of the nob about a dozen times.  I gave it a good tug on the front side to make sure it was secure and then just tied off the end.  Totally unprofessional method, but it worked perfectly.

So here is a picture of the back side of my fabric all tied off and ready to go.

And this is what it looked like when I flipped it over.  Kind of a neat affect!  At this point I wasn't sure WHAT to do next, so I improvised. 

I cut and laid out a piece of muslin on the wrong side of the pin tucked panel.  Then I pinned the muslin to the panel, careful to fold and tuck the creases just how I wanted them.  It definitely wasn't perfect, but I was going for more of a "natural" look so it worked out fine.

You can see my piece of muslin is much larger than the fabric panel.  I intentionally did this because I knew the fabric was going to move around once I started sewing the two pieces together and sure enough, it did.  Once I pinned and sewed all four sides to the muslin I just went back and trimmed off the excess muslin to create a nice finished look.  Again, totally unprofessional. :)

Then I cut a back piece out of a coordinating fabric and sewed the two pieces together, right sides together, leaving about 8 inches open for the batting.  I clipped the corners, turned it right side out and pushed out the corners to give them a more sharp edge. Then I pressed the whole thing and stuffed with batting.

Then I pinned the 8" opening closed and slip stitched shut.

Ta Da!  A very unique pillow that fits perfectly as the final piece in my family room pillow makeover.

PHEW!  
I'm excited about how it all turned out and am ready to move onto my next project in the family room... stay tuned for some projects that will have me sanding, hammering, and painting in the garage.   
YIKES!

I've linked up to Amy Lou Who Sew & Tell
AND
V and Co. 

Monday, March 29, 2010

Bath Tub Toy Bag

I saw a simple and brilliant tutorial for a bath tub toy bag on Make It and Love It and knew I had to make it.  The toys are always left all over the bottom of the tub and it makes me squirm when I think about the yucky stuff that probably is growing on them.  Hopefully this new bag will help hinder the growth of unwanted slimy grime.

I took the tutorial just a bit farther and added three rows of ribbon instead of just the one. My rows of ribbon are VERY crooked.  The mesh material that I bought wasn't the same as the stuff used in the tutorial (because it was the only kind JoAnn Fabric had), so I had a little more difficulty working with it than I would have liked. The weave of the mesh was too loose and lightweight.  But it was still a very straightforward project.  I used my serger for the seams which helped speed things along too.

All in all, I highly recommend this project to all levels of sewers out there.  Have fun!

Friday, March 19, 2010

A return to knitting - Knitted Washcloth

A very, very long time ago, my Grandma Yates taught my sisters and I how to knit.  We would spend at least a month out of every summer staying with my grandparents in Alaska, and during those summer visits we learned to knit.  Sadly, I gave it up after those summer visits ended and never really had a desire to learn again. 

Until NOW! 

My friend Cheryl sent me some knitted washcloths for my birthday this year and I fell in love with them. They are truly the best washcloths I've ever used.  She sent me four and I wanted more!  So when we went to Vegas together last month she gave me some yarn, needles and some patiently taught lessons to help me make my own.  And I finally finished one! 

Yes, it's been over a month since I went to Vegas.  I'm slow, but I kept the ongoing project in my purse at all times and only worked on it when I was out somewhere waiting on something, or in the car with DJ.  Now that I've finished one I'm excited to start the next one and give it a little more of my undivided attention.

Take a look at this fabulously awkward first washcloth! 


It has holes in places that shouldn't and it's sadly misshapen, but it's functional and now has sentimental value to it.  I love it.

Thank you Cheryl for reteaching me how to knit.  And thank you to my wonderful Grandma who taught me the first time around.  I love that I have another craft skill to add to my bag of tricks.  Long live crafting and the women who make crafting what it is today! ;o)

***OH, and if anyone out there wants this super easy and cute washcloth pattern, just leave a comment and I'll post it (courtesy of Cheryl of course)***

Thursday, March 18, 2010

BOY STUFF! Knit Pants and Tie T-Shirts

I have found that, just like every other crafty Mom out there, making stuff for the little boys in my life is always a bit more challenging.  I'm drawn to the girly crafts.  Girl clothes and accessories = cute and super fun.  I can't help it.  Not only that, but the level of reaction I get out of my 3 year old girl vs my 3 year old boy when I hand them a newly sewn "thingamajig" is drastically different.  "Oh my gosh, I love it so much Mommy, it's SOOO cute!", is a very big motivator for me to make her more stuff.  BUT... I've been trying to be good, and have spent some time recently on boy stuff. 

I bought quite a bit of knit fabric in boy colors, with the intent to make pants.  So make pants I did.  I decided to start with a basic blue pant and pair it with a Tie T-Shirt.  I used this wonderful tutorial from Saltwater Kids for the Tie T-Shirt and then just used my PJ/lounge pants experience to make the pants.  Simple elastic waste bands for my boys are PLENTY fancy enough for everyday wear. 

I haven't been able to find a white plain t-shirt in an 18 month size yet, so I'm on hold with Austin's shirt until I can get my hands on one.  But I made Ethan one and also made one for my friends little boy for his 2 year birthday.  I used a thrifted mens dress shirt for the tie fabric and it turned out perfectly.

Here's a look at all the pants, laid out and ready to sew.  Freshly cut and pinned fabric makes me feel all warm and happy inside.
 
And here a few pathetically taken photos of the final outcome.  Maybe if I had a decent backdrop and took a photography class, my pics wouldn't look like garbage. Oh well, it's low on the priority list at the moment.
I did a fake drawstring on the waistband because I like the way it makes the pants look, just a bit more polished then a plain band.  And I made them all really long and gave them big thick hems so that I can make the pants last for a couple years.  With the rate at which Ethan's waist is growing, he'll be able to wear these for the next 4 years.  No joke.

And here are my two super handsome boys sporting the new look.  (Austin minus the tie shirt of course)  Seeing these guys looking so cute in their new duds does help inspire me to make more boy stuff. Come summertime that will be all I'm doing (shorts, shorts and more shorts).
I just linked this post up to Sew & Tell from Amy Lou Who.  This is my first time ever doing this and it's pretty fun to see everything that everyone out there is working on and share ideas and successes!

Monday, March 15, 2010

Trendy Office Accessories

This year for my sister Kyra's birthday, my other sister, Kahly, and I decided to give her a whole bunch of hand made office accessories.  We knew we wanted the main present to be a laptop case (since Kyra had been drooling over the other ones we made) and then we had a lot of fun blog surfing for additional gift ideas.  Delving into the world of Mod Podge was an absolute must. The question was where to start? And equally important, where to stop?  Once you start Mod Podging it's almost impossible to quit.

So here's the breakdown of what we settled on:
We had one heck of a time picking out just the right color scheme and finding coordinating fabrics to match.  We spent THREE hours in JoAnn Fabric one Friday night, trying to buy fabric.  It's so hard to pick out colors for someone else, especially when you know they'll be using the things you make them on a daily basis.  It was touch and go at points during that evening.  At one point we were so hungry and so cranky that Kahly went outside the store and bought a box of Girl Scout cookies.  We ate the entire box right there in the store.  Once on a complete sugar high, we were able to find the right fabrics and high tale it out of there.  What an adventure, torture, fun time, interesting experience. :)

Laptop case, front and back.  We pieced together the exterior panels with an espresso brown zebra print and did the flannel lining out of a pale pink.  Obviously our color palette we settled on was pink and brown.

Aren't these clippies the cutest thing ever?  Kahly and I will be making some of these (and some of the slugs and mouse pads) for ourselves next. 

 The slugs were made out of the same pink flannel from the laptop case and filled with flax seeds so that they can be warmed up in the microwave.  We thought this was a nice touch for Kyra, since she's ALWAYS freezing cold at work.

And finally the notebooks.  We used the Microsoft company wide notebooks for this project which Kyra got a kick out of. 

Most of the projects, with the exception of the laptop case, were easy and fun to do.  Mod Podge is the best stuff ever invented and has become my new best friend.  The accessories were a bit hit and Kyra's on her way to having the most trendy and cute office in all of So. Cal.  Love you Kyra, Happy Birthday!

Thursday, February 25, 2010

Girl Skirt WITHOUT an Elastic Waistband

I was at it again today, testing out my skills with gathering and knit.  Today went quite a bit better for a couple reasons.  First, I was only using knit for half of the project and second, the tutorial I used was brilliant.  Somehow I stumbled upon The Mother Huddle blog and found this tutorial for a no elastic waistband skirt.  It's such a great idea so I had to try it out.

It just so happens that I have been dejunking and reorganizing the kids bedrooms this week and had a huge pile of clothes that were too small and needed to be toted up and put in the attic.  After reading through some repurposing blogs today I started too look at this pile of clothes with new eyes.  I pulled out two dresses of Addison's that I knew I could do something with.  I also had a huge bag of my clothes that I was ready to take to Good Will that I pulled back out of the car and rummaged through with this great tutorial in mind. 

I'm so glad I did a "second take" with these clothes.  So many new possibilities!  So many cute ideas floating around in my chaotic little head!  And here is the result of today's adventures.

 I forgot to take a pic of the dress before I cut the top off, but you get the idea from this picture.  

I gathered the top of the new skirt piece and then cut the bottom off of my old stretchy knit shirt.

I measured Addison's waist and sewed the new waist piece to fit.  I had to do this step twice.  The first time I made it too big so I cut it up again and resewed it.  Better too big than too small, right?

Sew the two pieces together and TA DA!  It's such a great skirt because the waist band is super stretchy and will allow her to wear it for a long time.  Maybe a piece of clothing will actually last longer that one season for her!  WOW, what a concept.

(STUPID BLOGGER keeps turning this photo on its side and I can't get it up and down. ARG!)

Now I need to refocus myself on some boy clothes.  I could tell Ethan was feeling a little left out today when I gave Addison yet another skirt.  Time to use my cute new knit fabrics to make some boy pants!

Wednesday, February 24, 2010

Knit Fabrics and a Play Dress

My very large order of knit fabrics from Chez Ami arrived a few days ago.  I was drooling over every one of them and had to take a picture for posterity.  Aren't they so shiny and pretty!? :)


After washing them all up I got right to work making Addison a upcycled play dress using a stained white shirt and this tutorial from Ruffles And Stuff.  This is another favorite craft/sewing blog that I frequent and my list of to do projects from her site is growing out of control.  My version of the dress definitely didn't take 15 minutes, but it wasn't too bad and I was able to finish it in a couple hours.  I learned from this project that I've got a long way to go before I'm comfortable with making a ruffle and before I'm used to sewing with knit/stretchy fabrics.  It's just a matter of lots of practice, like everything else!

This dress is definitely just for playing around the house.  It's got an uneven and unhemmed bottom edge and the seam where I added the knit fabric doesn't lay down very well.  Plus the white shirt I cropped off to make this dress was a bit stretched out around the mid section, so it makes the dress a lot more "full" than I'd normally like.  But hey, she loved it and won't take it off at the moment, so that's what counts!

Onto the next project with my fab-tab-ulous new fabrics!  Wahoo!